The premium version of WP Data Access includes a powerful Query Scheduler that allows you to automate SQL query execution. This feature works with both private and global queries and is accessible via the query context menu (three-dot icon in the tab bar).
Starting a Schedule #
- Save your query
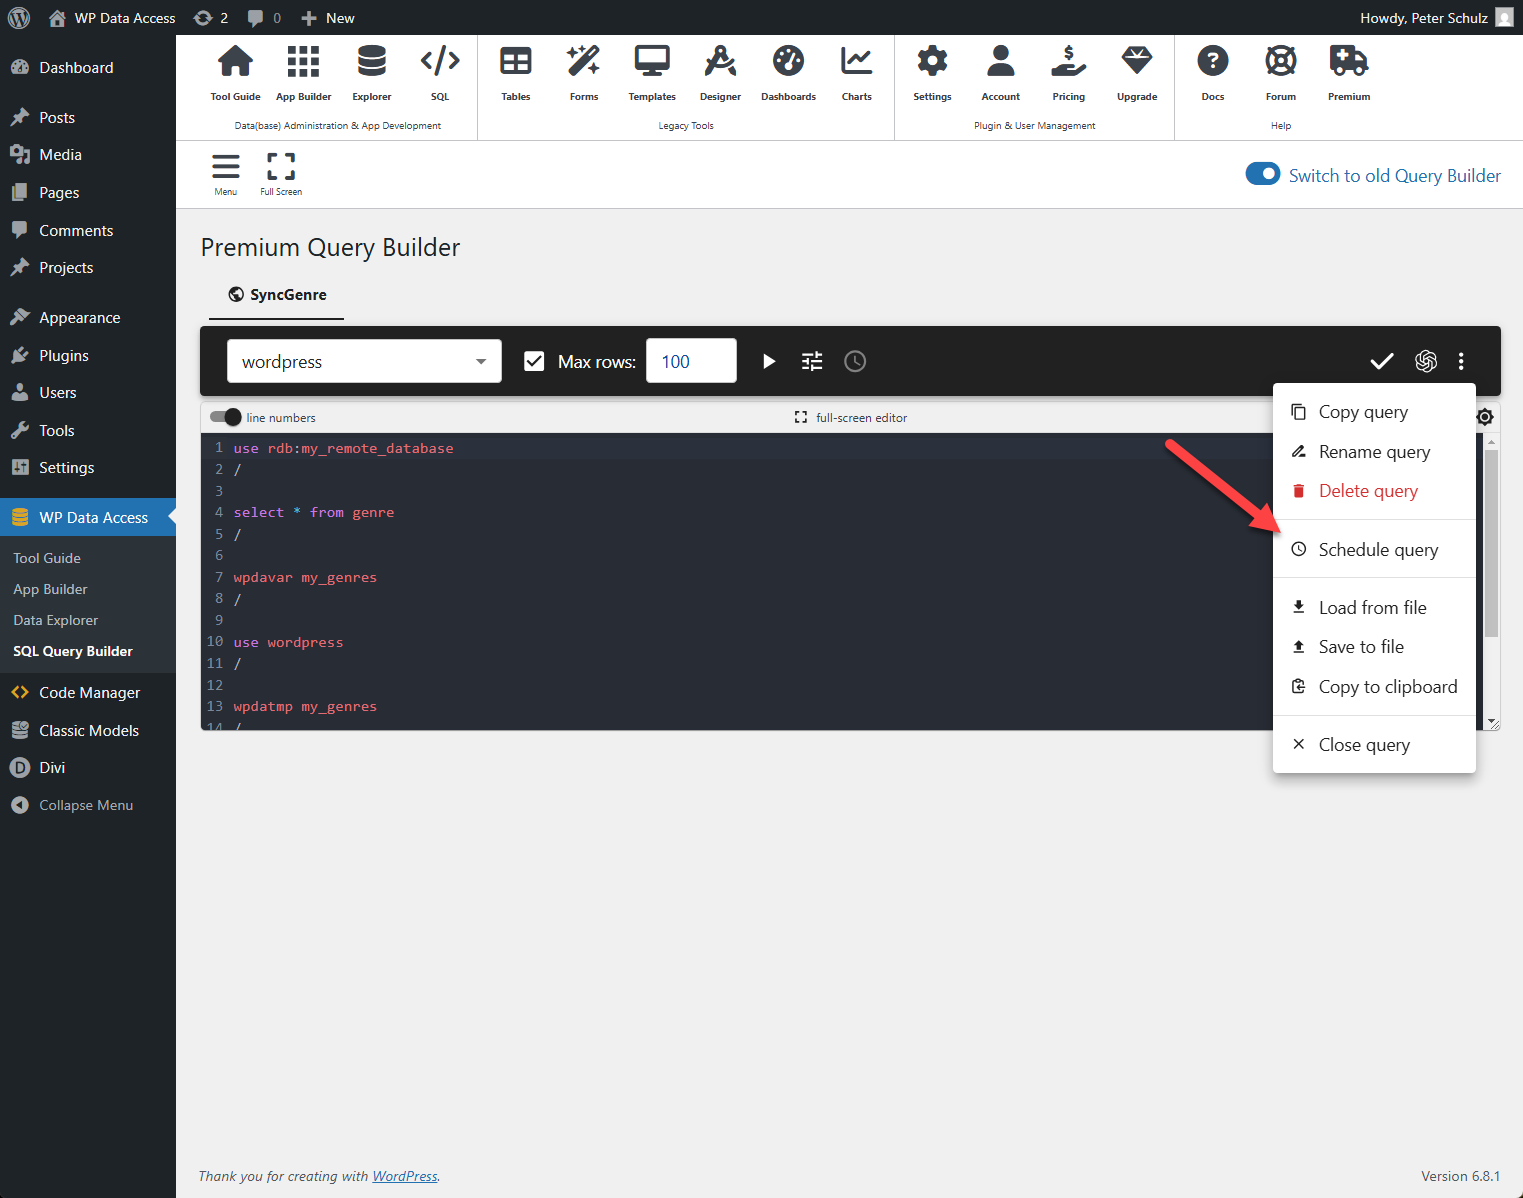
- Open the query context menu (three-dot icon ) and select “Schedule query”
In the scheduling dialog #
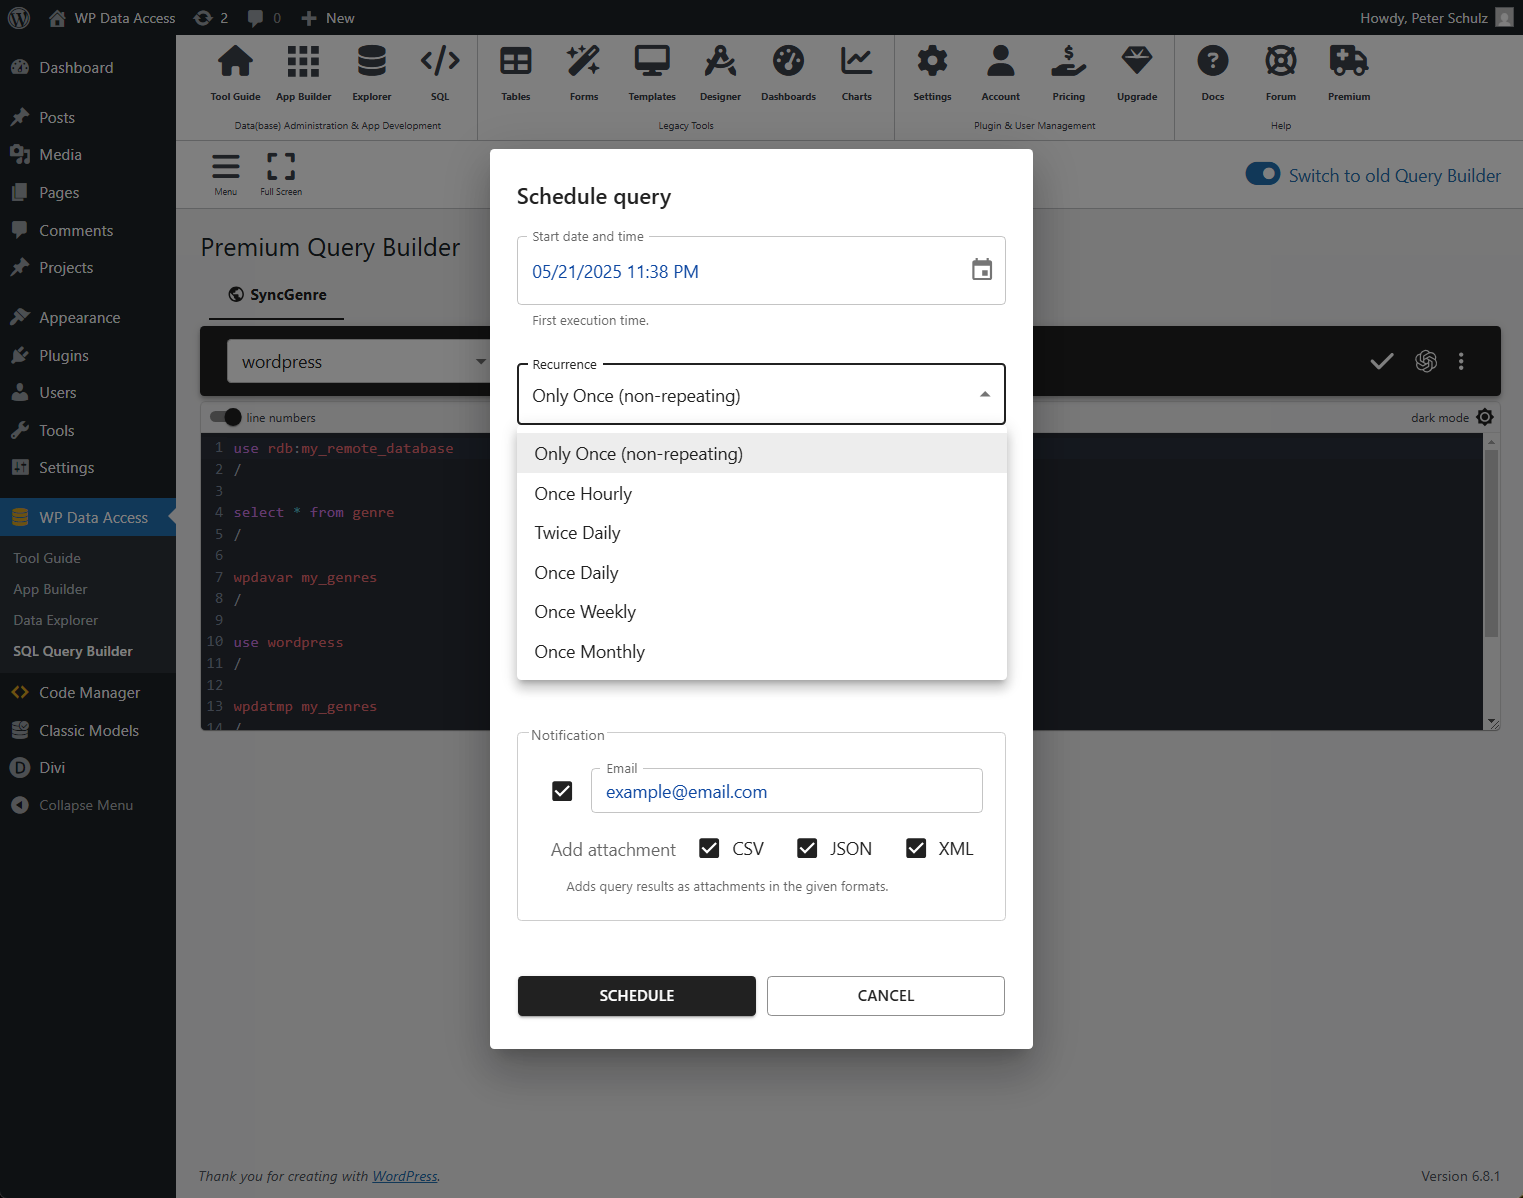
- Set the start date/time
- Choose the recurrence (e.g., hourly, daily, weekly)
- Enter notification settings (if you want results sent to your email)
- Click Schedule to activate
Scheduled queries can be configured to send results to a mailbox. Output formats include CSV, JSON, and XML. Even results from transactional queries (e.g., INSERT, UPDATE) are delivered to your inbox. Errors will also be emailed to you. To use the mail feature, configure your mailbox under Plugin Settings > Mail.
Show active schedules #
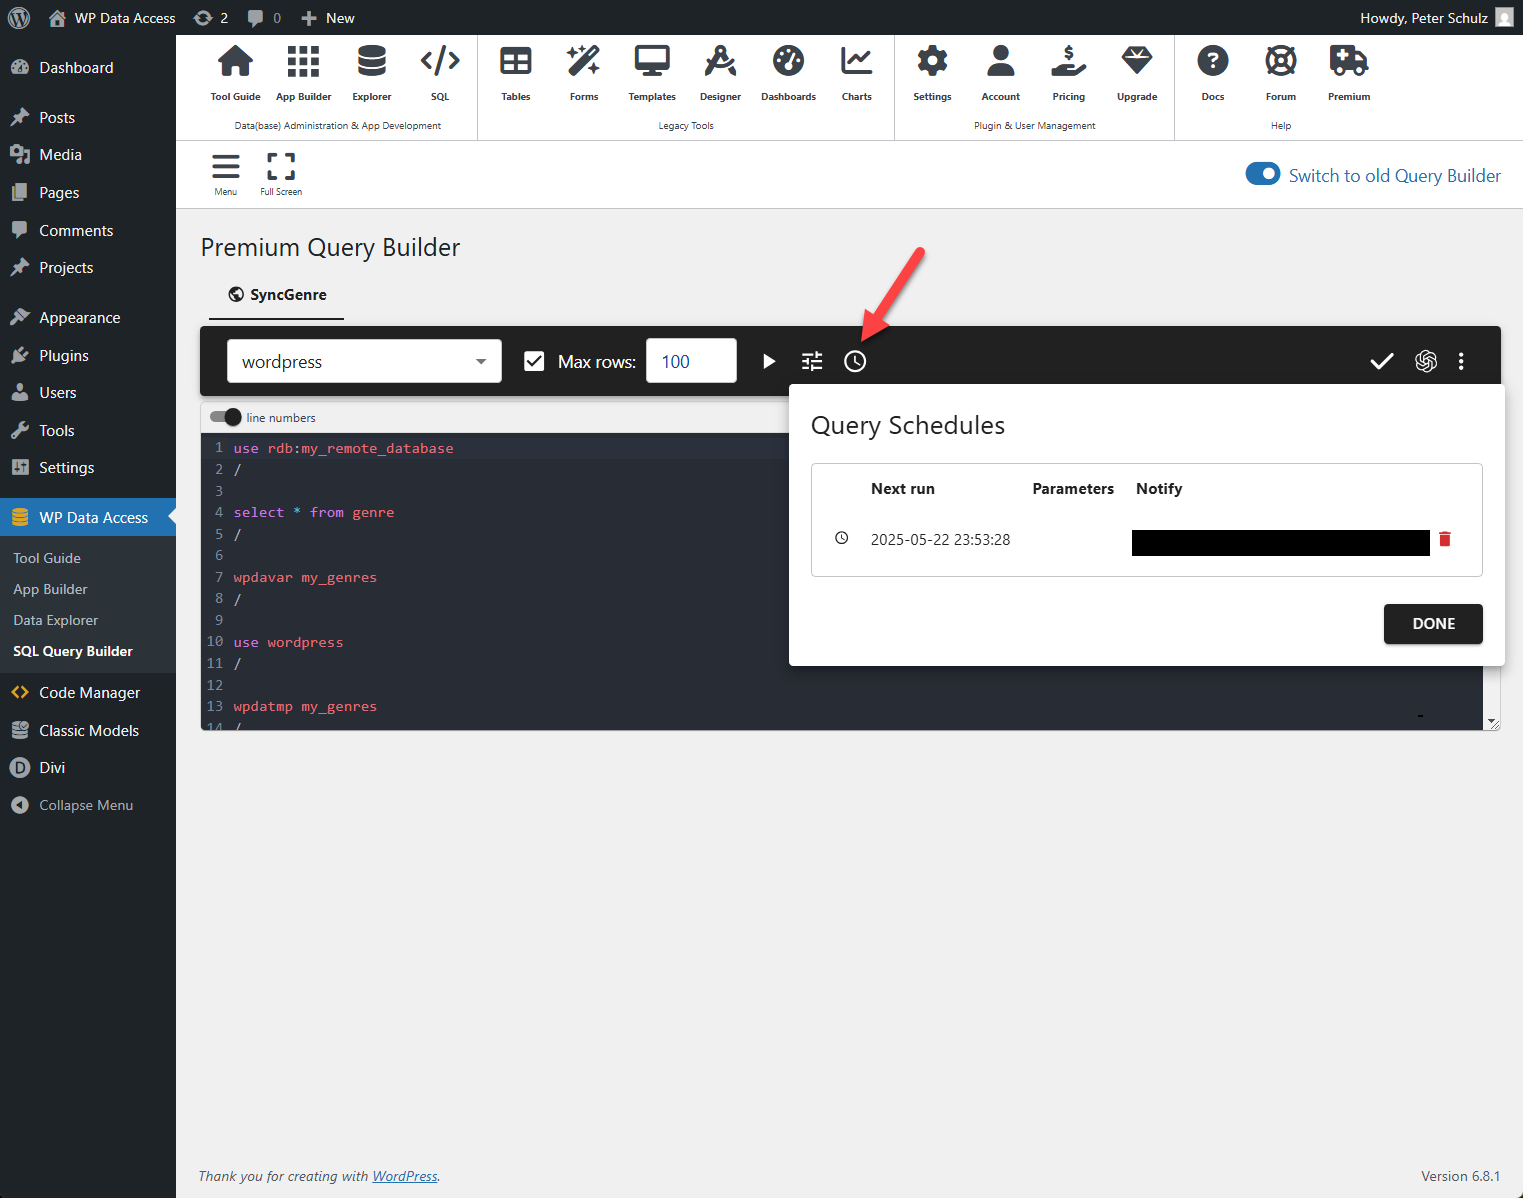
The query will run at the scheduled time and repeat based on your chosen interval. You can view active schedules for a query by clicking “Query schedules”.
Query Parameters #
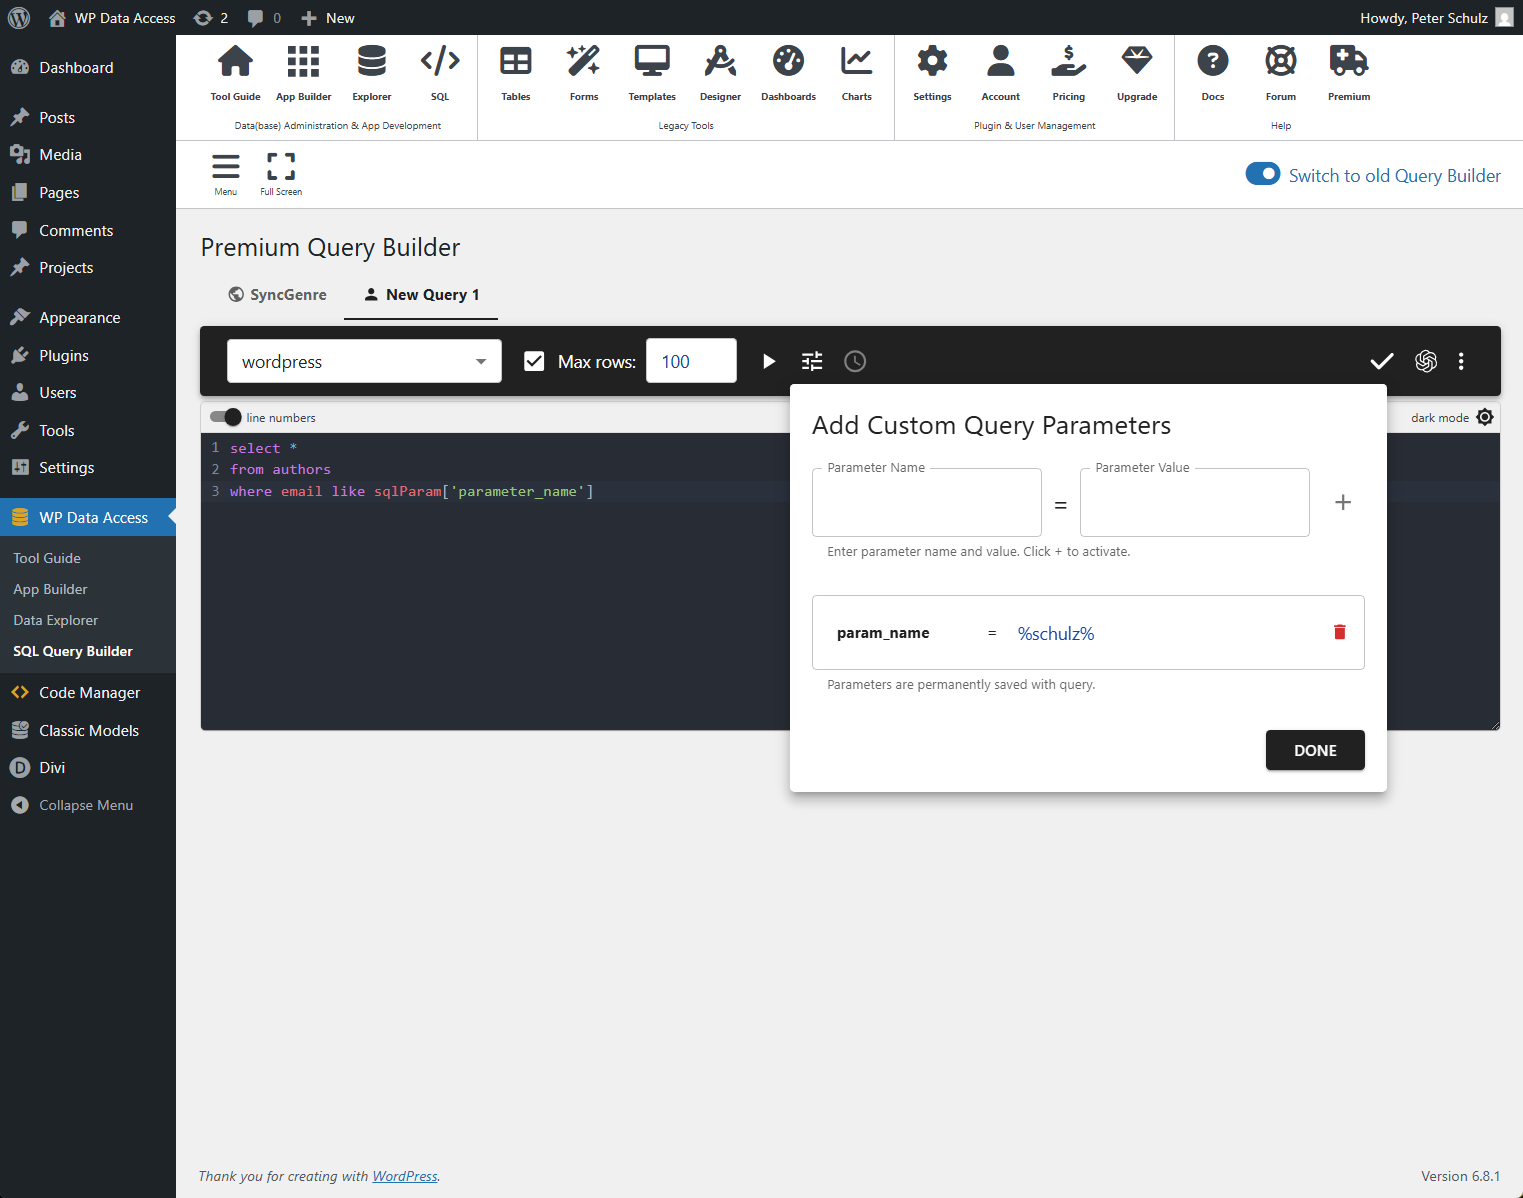
You can run or schedule a query with different parameter values using query parameters. Click the “Add Parameters” button. In the dialog, define a name and value for each parameter.
Example using query parameters in a query #
select *
from authors
where email like sqlParam['param_name']
All parameters are sanitized. Queries are executed as prepared SQL statements for safe, secure operations.
Using MySQL Event Scheduler (Advanced) #
If you’re using a self-hosted MySQL server, you can take advantage of the MySQL Event Scheduler as a free alternative. This feature is not available on most ISP-hosted servers.
Example creating a scheduled MySQL event #
CREATE EVENT log_activity_event
ON SCHEDULE EVERY 5 MINUTE
DO
BEGIN
  INSERT INTO log_table (event_name, log_time)
  VALUES ('Scheduled Event Triggered', NOW());
END
/
Read more about the MySQL event scheduler


