This guide walks through new users in creating a simple data table app using the App Builder. Our goals for this data table app will be the following:
- The app will display the Employees table as a data table.
- Visitors can search and export this table.
- A lookup column will be set up for the Department column.
- A column filter should be active for the columns Job and Department.
- Change the color theme of this table to orange.
Create A New App #
1. From the WordPress admin, go to WP Data Access > App Builder, and click on the Create New App button.
2. Go through the App Wizard, and select Data Table as the App Type. On the Authorization step, choose Anonymous Access if you wish to display the table on the front end for all visitors.
3. Once the app is created, click on Run & Build to open the Table Builder.
4. The page will open to a table view of your app. On this page, we’ll start setting up the following using the Table Builder.
- Enable Search for the table.
- Rename column headers.
- Setup a lookup for the Department column using another table.
- Enable column filters.
- Change color theme.
1. Enable Global Search #
Global Search is enabled by default when you first create the app. You can find this setting by clicking on the table builder icon and going to the Table option tab, then scrolling down to Global Search.
2. Rename Column Names #
While the Table Builder toolbar is open, go to the Columns option tab. To rename the column names, click directly on the column name and type to edit. The changes will appear real-time on your table, however, you need to click OK or Apply to save the changes.
3. Setup Lookup #
The employee table has a column called dept which refers to the employee’s department. This data is stored as numerical data referring to a department ID in another table. To make this column coherent for the visitors, we’ll set up a lookup to that table.
Open the Table Builder, go to Columns tab, and then click on the Department column. Click on Lookup > Start Lookup Wizard. To learn more about the Lookup Wizard, please visit: Lookup Wizard | WP Data Access
4. Enable column filters #
To add column filters, open the Table Builder, go to the Columns tab, click on the Jobs column, and then open Column Actions. Toggle to enable “Enable column filtering” and choose any filter option.
After enabling column filters, a new icon beside the search will appear. Filters are hidden by default when an app is created. You can change this by opening the Table Builder and then going to Table > Column Filters to enable “Show column filters on startup“.
5. Change the theme #
Open the Table Builder and go to Theme > Palette. Click on any color and click Apply.
Adding the table on the front end #
To display the table on a front-end page, go to App Builder, hover over your app from the list, and click on Manage App.

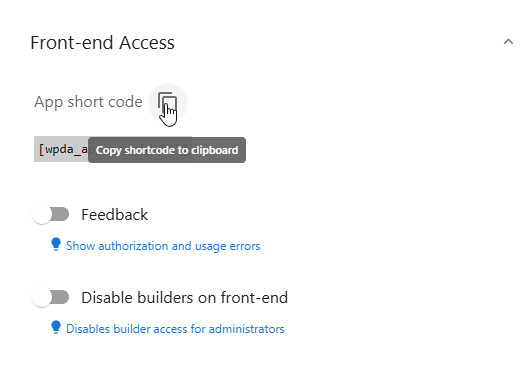
Go to the ACCESS menu, then Front-end Access. Copy the shortcode and add it to your front-end page.

Final Result of our Simple Data Table #


